Helping campers since 2011
Dutch Oven Care
With some basic Dutch oven care, your cast iron camping Dutch oven can last for generations! Here's what you need to know.
I use a cast iron Dutch oven for camping. I highly recommend cast iron for its durability and non-stick coating.
All of the information on this page refers to cast iron Dutch oven care.

Dutch Oven Care

CLICK HERE for further details and to purchase the above Dutch oven.
Bringing home a new Dutch oven
Congratulations! You have a new cast iron Dutch oven!
It probably has a protective coating that kept it from getting rusty on its journey to your home. Before you can use the oven, you'll need to remove the coating.
Removing the protective coating
Follow the manufacturer's directions - or just give it a good scrub with dishwashing detergent and a plastic scrubbie.
You will never again use soap on your cast iron Dutch oven!
Seasoning a Dutch Oven
The first step in Dutch oven care is seasoning. You'll need to do this before you use it.
This will turn your Dutch oven into a fabulous non-stick pot which will be a breeze to use and to clean.
This aspect of Dutch oven care takes some time and effort, but it's worth it! If all goes well, you will have to do this only once.
Season your Dutch oven at home. Don't wait until you get to the campground!
You will need
- vegetable oil
- paper towels or a clean rag
- baking sheets
What to do
- Make sure your Dutch oven is completely dry.
- Preheat your kitchen oven to 375F/190C.
- Use a paper towel or a clean rag to coat the Dutch oven (inside and out) with a generous layer of vegetable oil.
- Do the same to the top and bottom of the lid.
- Place the Dutch oven and the lid upside down on baking sheets and place them in the oven.
- Turn on the range top fan if you have one - or open a window if you don't. There will be some smoke and odor.
- Bake for about an hour.
- Turn off the oven and allow the Dutch oven and lid to cool slowly. (It's easiest to let them cool overnight.)
- Repeat the process: preheat the oven, coat the pieces with oil, place them upside down, bake for an hour and let cool.
- You're almost done! Now, just warm the Dutch oven on the stove and coat its interior with oil one more time.
Your Dutch oven is seasoned and ready to use!
The great thing is that each time you use the Dutch oven, you'll be re-seasoning it as you cook! The more you use it, the better seasoned it will be!
Click here for tips on using your Dutch oven.
Cleaning a Dutch Oven
If you have seasoned your oven well, Dutch oven cleaning is easy!

Do not use soap or detergent!!
Soap will remove the oil seasoning that you worked so hard to apply - and your next meal might have a soapy taste!
Regular Dutch Oven Cleaning
You will need
- a metal, plastic or wooden utensil
- a plastic scrubbie
- paper towels or a clean rag
What to do
- Use the utensil to scrape off any food remaining in the pot.
- Add some warm water.
- Use a plastic scrubbie to scrub off any remaining food.
- Rinse with clear water.
- Repeat as necessary.
- Dry immediately with paper towels or with a clean rag.
Removing Stubborn Deposits
Sometimes regular cleaning won't do the job.
Perhaps the pot wasn't thoroughly seasoned, or perhaps there is burnt food stuck to the bottom.

Here's the trick that I use to remove stubborn deposits:
You will need
- salt
- a metal flipper
- a plastic scrubbie
- paper towels or a clean cloth
What to do
- Pour some water in the pot.
- Sprinkle in a teaspoon or two of salt.
- Bring the water and salt to a boil (on a stove or over the campfire). Let it boil for 5 minutes or so.
- Use the metal flipper to scrape off any remaining bits.
- Pour off the water.
- When the pot has cooled, add a bit of warm water and use your plastic scrubber to scour the pot.
- Dry the pot and lid with paper towels or with a clean rag.
- Take a look at the inner surface of the pot. Is it still black and shiny? If not, reseason it by coating it with oil, and sitting it on the fire. (If you're at home, coat it with oil, turn it upside down on a baking sheet and bake it for an hour at 375F/190C.)

Clean your dutch oven with this cast iron cleaner. It's basically a piece of chain mail. You use it like a scrubber, and it takes baked-on food right off.
It gets excellent, rave reviews from everyone who has tried it.
It works on steel pots too, without scratching or damaging the surfaces.
Storing a Dutch Oven
- Be sure that your Dutch oven is completely dry.
- Don't store the lid on top of the Dutch oven. If you must do so, place a clean tea towel between the oven and the lid to allow air flow.
More Tips About Dutch Oven Care
- Never leave water standing in a cast iron pan for more than a few minutes, because of the potential for rust.
- Always dry your Dutch oven with a cloth or paper towels. Don't air dry.
Now that you know everything I know about Dutch oven care, click here to find some Dutch oven campfire recipes !
There's lots to think about when planning a camping trip. The Camping Family home page will help you stay focused.

Most Popular
Product of the Month

Amazon Basics 40°F Cool Weather Two-Person Sleeping Bag
Cool weather is here!
CLICK HERE for more information and best price
Recent Articles
-
A Complete Backpacking List For 2 Days - Don't Forget Anything!
Apr 21, 26 09:20 AM
 Take a look at our complete backpacking list for 2 days; All the essentials but nothing to weigh you down on a backpacking trip!
 -
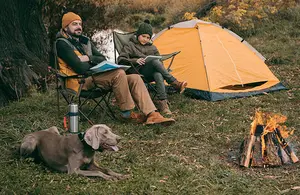
Tips for Camping with Dogs - What You Must Know!
Apr 21, 26 05:40 AM
 Tips for Camping with Dogs - The Ultimate Guide! We walk you through all you need to know, from packing the right gear to keeping your dog safe by the campfire
 -
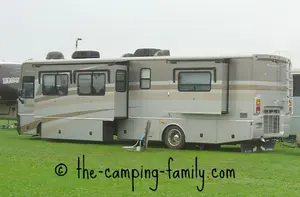
The Best RV Camping Guide For Families
Apr 19, 26 08:01 AM
 If you are looking for the best RV camping guide for your family, you have found it!. RV camping can be one of the easiest ways to enjoy the outdoors.

